5.14.1.2. Create ERP
number with 3Dfindit / PARTdataManager 5.14.1.2.3.
Create ERP number directly on
export
|  |
| Prev | Next |
5.14.1.2. Create ERP
number with 3Dfindit / PARTdataManager 5.14.1.2.3.
Create ERP number directly on
export
| |
| Prev | Next |
erpcustom.cfg -> Block [dialogOnExport]
The function is called up by clicking on the button.
[dialogOnExport]
activ=1
default=0
norm/=1
The key activ(0/1) controls the basic activation of the export dialog.
0: The automatic assignment of the ERP number runs silently, without dialog. The number is displayed immediately PARTdataManager the export then runs immediately. The number is transferred to CAD with the part properties.
In this case, a number should be assigned automatically (timestamp on).
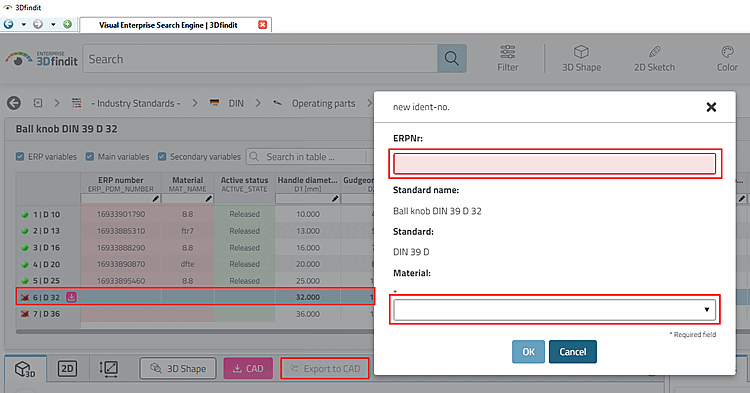
1: In addition to the automatic assignment of the ERP number, the New Ident Number [new ident-no.] dialog box appears.
If needed, here, you can enter more specified variable values. Then they will also be added in the link database.
Depending on whether the assignment of a timestamp number is turned on or off, the field "ERPNr." is active or grayed out.
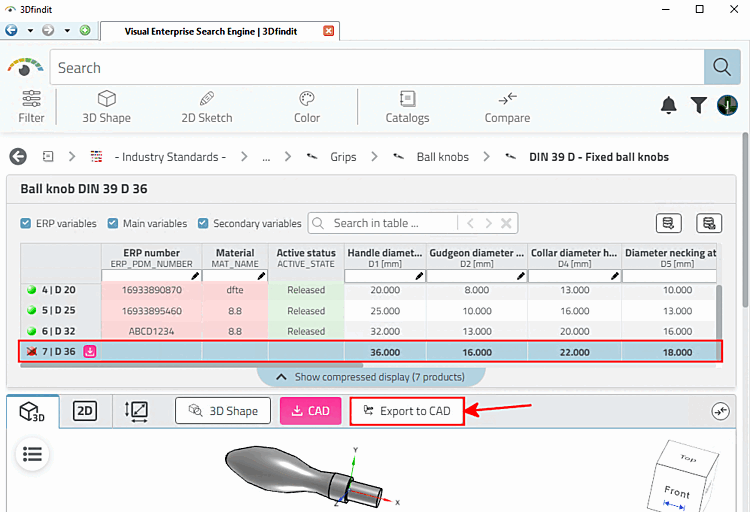
Select a row without ERP number.
(If the export button is pressed in a line with an ERP number, no New ID number [new ident-no.] dialog appears)
The figure shows the dialog in 3Dfindit with the help of an example without export restriction. No timestamp number has been assigned, so that the number has to be manually entered.
-> The New ident number [new ident-no.] dialog opens (if the "active" key is set to 1).
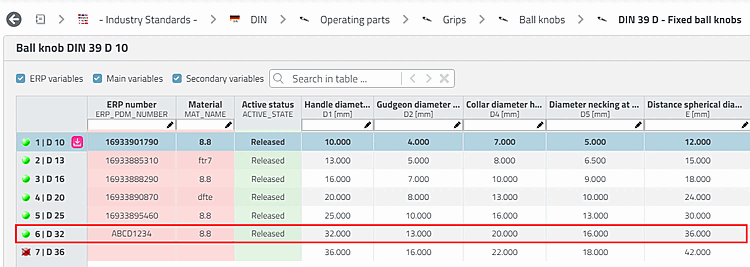
Enter a number under ERPNo. and select a material in the list field.
-> Number and material (and possibly other values) are set in the table.
In addition, you can specify via config key, whether the dialog shall be displayed at all parts or only for parts of the industry standards catalog.
[dialogOnExport]

default=0
norm/=1
When exporting, for lines already containing an ERP number no dialog box appears.
The functionality described could just as well be used in combination with an export condition [Export condition] (see Section 5.7.5.1.7, “ Export condition - plinkgroups.cfg -> Block [role name] -> Key "EXPORTRESTRICTION" ”). Both functions are independent in themselves. However, it must be ensured that the conditions interlock in a meaningful way.
![[Note]](images/note.png)