7.9.3.14.
Modify -> Thread
7.9.3.14.2.
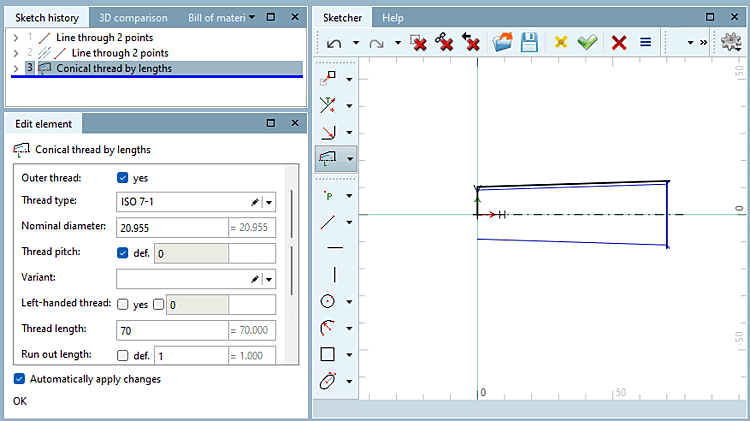
Conical thread by lengths
|  |
| Prev | Next |
In the following section, you will learn how to create a tapered thread over length [Conical thread by lengths].
Right-click on a line > Characteristics [Attributes] to define the rotation axis [Rotation axis].
The tool cannot be used without a rotation axis. The icon is then grayed out.
 In the toolbar, click Conical thread over length [Conical thread by lengths].
Follow the instructions in the footer of the sketch. Click on the corresponding sketch elements and areas.
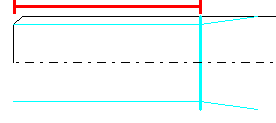
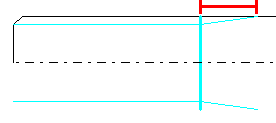
Select start of thread... [select thread start...]: Select the start of the thread. The selection must be a line.
Select thread end... [Select end of thread...]: Select the end of the thread. This can be a reference point or a free point.
Select material side... [select material side...]: Determines the material page, can be changed later.
Enter a valid nominal diameter. [Nominal diameter] The value entered here must be exact! It is therefore advisable to select a value directly from the table in the field via Right-click > Valid values [Applicable values].
You can also use a formula, a function or work with variables. The only important thing is that a valid value is created from the table.
You can adjust the thread in the Edit element docking window.
External thread [Outer thread]: Specify whether the element is an external thread. Depending on the selection of the material side (step C), a check mark is automatically set here.
Nominal diameter: Enter a valid value from the table as the diameter.
Thread pitch: If the option "def. [def.]" (default) is set, a standard thread is created according to the set standard. If you want to create a fine thread with defined thread pitches, deactivate the option and enter the variable name or value for the thread pitch [Thread pitch]. You can select valid values directly by right-clicking in the field > Valid values [Applicable values].
Variant: Is used for certain threads and enables a further specification. Is empty in most cases.
Left-hand thread [Left-handed thread]: Select whether the thread should be a left-hand or right-hand thread.
Thread length: If a free point was selected in step B, you can define the thread length yourself, otherwise it is specified by the selected element.
Run-out length [Run out length]: If a free point was selected in step B, you can define the thread length yourself, otherwise it is specified by the selected element.