7.9.3.14.
Modify -> Thread
7.9.3.14.1.
Cylindrical thread by length
|  |
| Prev | Next |
In the following learn how to use a cylindrical thread via length [Cylindrical thread by length] .
![[Tip]](images/tip.png) | Tip |
|---|---|
This one
The example shown can be found in the training catalog at
| |
Determine by right-clicking on a line, features > the [Attributes] axis of rotation [Rotation axis].
Without a axis of rotation, the tool cannot be used. The symbol is then greyed out.
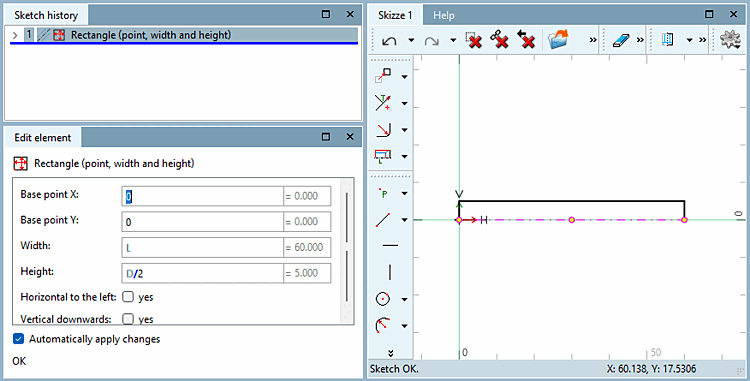
 In the toolbar, click Cylindrical thread over length [Cylindrical thread by length].
Follow the instructions in the footer of the Sketch. Click on the corresponding sketch entities and areas.
Select Outer Edge... [select outer edge...]: Via the Outer edge defines the nominal diameter for the thread.
Select thread beginning... [select thread start...]: Select the beginning of the thread. This must be a line element.
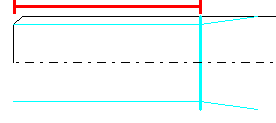
Determining the thread depth... [Determine depth of thread...]: Laying Fix the thread depth. There are several options here: Click on an end element for a continuous thread. This thread then has no thread outlet and thus Skipped step D. Alternatively, you can use a free click in the sketch or select a reference point - Important! In this context, no line can be selected.
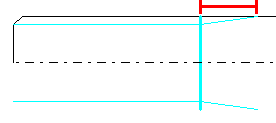
Determine expiring ones... [Determine thread end...]: If threads with thread depth used to control the leaking .
Determine the material side... [select material side...]: Determines the material side, can be changed later.
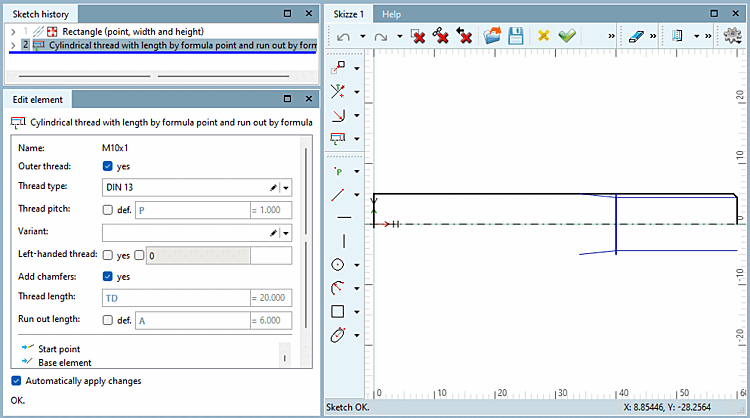
In the Element docking window you [Edit element] can adjust the thread.
Male thread [Outer thread]: Specify whether the element is an external thread. Depending on the selection of the material side (Step E), a check mark is already automatically set here.
Thread Type [Thread type]: Select the type you want from the list.
Thread pitch: Is the option "def." (default), a Control thread according to the set norm. If you have a fine thread with defined thread pitches, deactivate the option and specify the variable name or value for the thread pitch [Thread pitch] . Valid values you can select Valid values [Applicable values] directly by right-clicking in the > field.
Variant: Used on certain threads and allows for further Specification. Is empty in most cases.
Left-hand thread [Left-handed thread]: Select whether the thread should be a left-hand or right-hand thread.
Thread Length [Thread length]: If at step C a free point has been selected, the thread length can be defined by yourself otherwise, it will be used by the selected element .
Run-out length [Run out length]: If a free point has been selected, the thread length can be defined by yourself otherwise, it will be used by the selected element .
A detailed example from the eCATALOG 3Dfindit training manual for creating an internal thread can be found here: Section 2.8.3, “Sketch 3 - Insert internal thread ” in eCATALOG 3Dfindit Training - Creating a cap nut.