3.3.3. CATIA V5
Macro 3.3.3.1. CATIA macro
interface installation |  |
| Prev | Next |
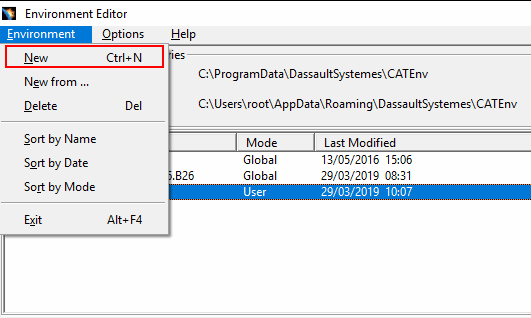
Make sure that the environment variable CADENAS is set.
Via control panel, open the dialog area "Environment variables". The CADENAS environment variable points to where the software is installed (locally).
For example, for a standard installation this would be:
C:\Program Files (x86)\cadenas\partsolutions\software
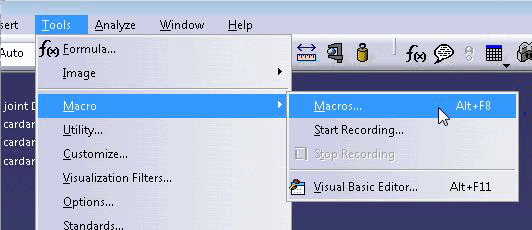
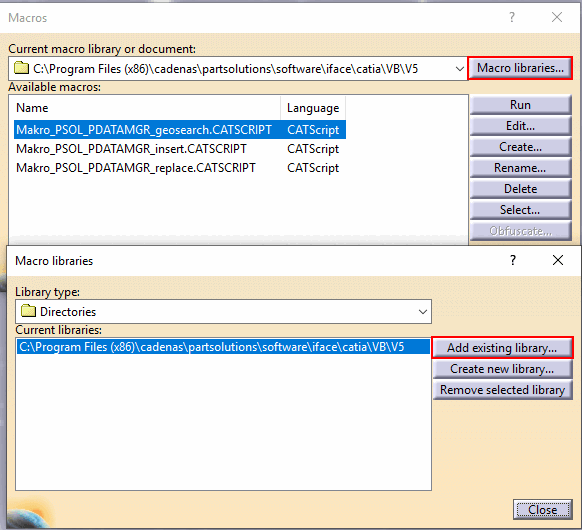
Copy needed files for CATIA interface
Copy the current interface files provided by CADENAS from the ..\iface\catia folder into the software interface directory (..iface\catia) of your 3Dfindit installation.
Copy the one provided by CADENAS
provided current configuration files ifcatia.cfg and ifcatiav<5|6>macro.cfg
the setup directory into the setup directory of your
3Dfindit installation.
Add link to your interface icons
Open and edit the following Cadenas.txt file:
C:\Users\root\AppData\Roaming\DassaultSystemes\CATEnv\Cadenas.txt
The key value of CATGraphicPath must point to the interface icons:
CATGraphicPath=%CATGraphicPath%;<Schnittstellen-Installationspfad>software\iface\catia\VB\resources
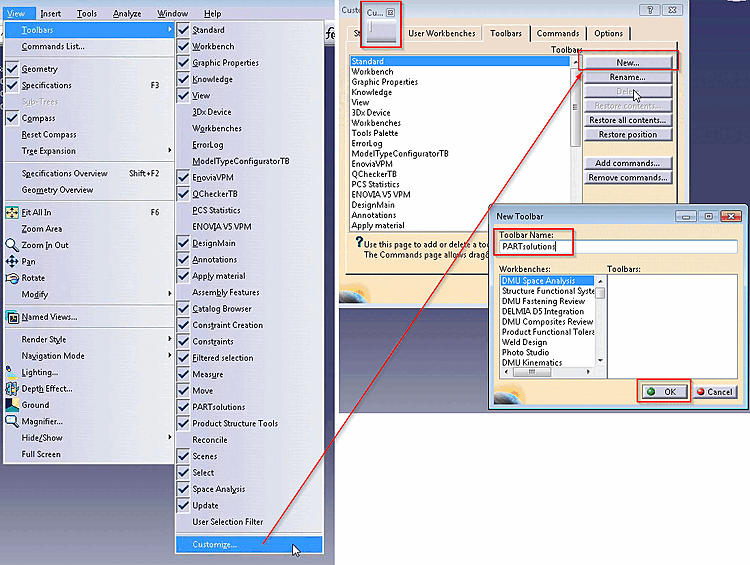
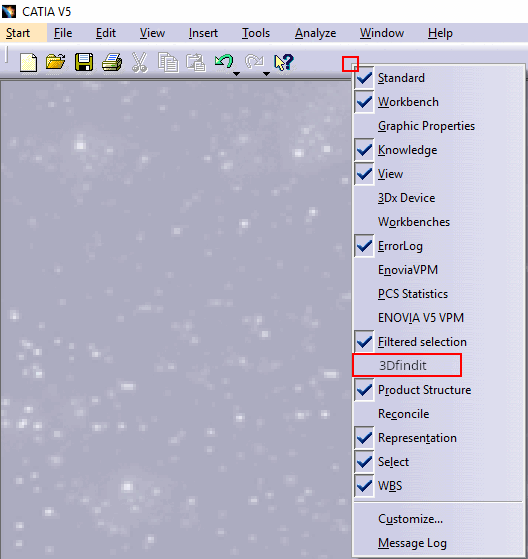
Enable your toolbar and fill it
Right-click on the toolbar and click on the created toolbar name (in this case 3Dfindit ) in the context menu.
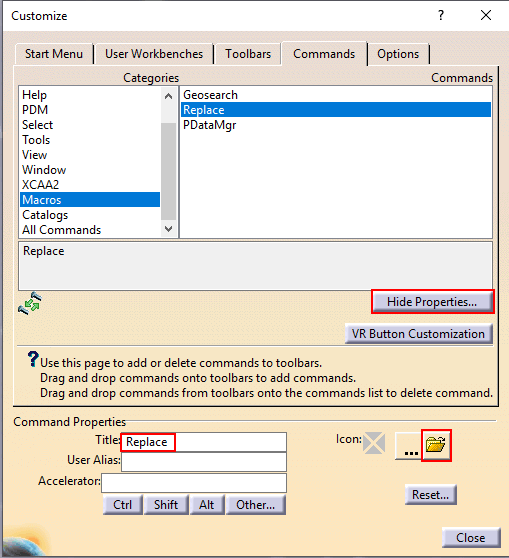
Switch to the Commands tab page.
-> The Command Properties dialog area opens (button label changes to ).
Enter the desired display name of the function under Title. (In the picture above "Replace")
Now you can drag and drop the command from the Categories -> Commands dialog area onto your toolbar.
-> The interface icon set before is shown now.
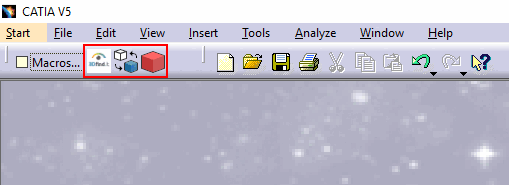
| Tooltip | ||
| Insert 3D |
Start of PARTdataManager and transfer of parts from 3Dfindit to CATIA V5. | |
| Replace | ||
| Geosearch |
![[Note]](images/note.png) | Note |
|---|---|
Click on an individual menu item to jump to the appropriate place in the documentation. You can navigate back to the starting point by entering + . | |