5.5.4. Step 4: Edit project
5.5.4.2. Create characteristic attribute table *.tac
|  |
| Prev | Next |
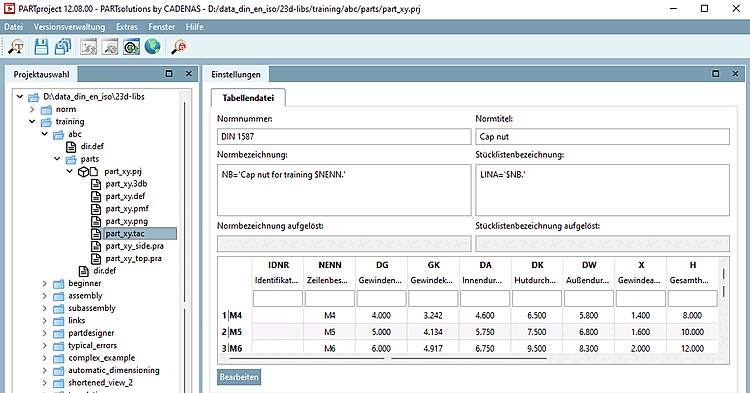
Click on the button in the Settings dialog area.
Confirm in the Edit file menu window with (if it is opened).
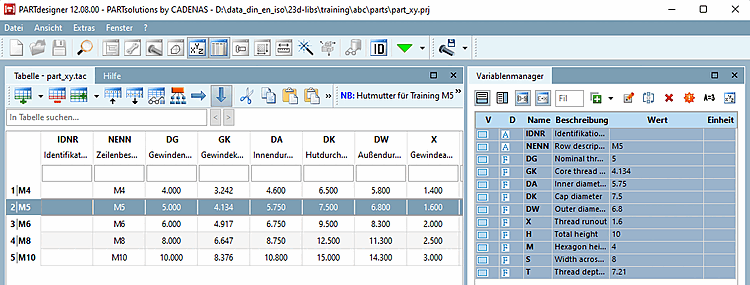
Create the characteristic attribute table/ *.tac file of your part. In this example the cap nut from the "Cap Nut Training" is used. On this compare under Section 7.5, “Create table: Small example from A to Z ”.
Save the *.tab or *.tac and close PARTdesigner.
→ In PARTproject, the characteristic attribute table of the cap nut is transferred as "part_xy.tac". When you click on the button again, the newly created table is opened immediately.
→ Later, the table will be visible in the PARTdataManager parts view [Part view].