Kapitel 5. Strategisches Teilemanagement
5.11.
Spaltenanzeige konfigurieren - plinkcommon.cfg
-> Block [LINKDBFIELDS] -
|  |
| Zurück | Weiter |
Kapitel 5. Strategisches Teilemanagement
5.11.
Spaltenanzeige konfigurieren - plinkcommon.cfg
-> Block [LINKDBFIELDS] -
| |
| Zurück | Weiter |
Der Block [LINKDBFIELDS] zeigt eine Auflistung aller existierenden LinkDB-Variablen.
[LINKDBFIELDS]
PRJ_PATH="<%linktable%>.PRJ_PATH","PSol Project","","1","1","0","1","0",""
VARSET="<%linktable%>.VARSET","PSol MIdent","","1","1","0","1","0",""
VARSET_UPDATE="<%linktable%>.VARSET_UPDATE","PSol MIdent","","1","1","0","1","0",""
LINE_ID="<%linktable%>.LINE_ID","Line-ID","","1","1","0","0","0",""
LINE_SUBID="<%linktable%>.LINE_SUBID","Line-SubID","","1","1","0","0","0",""
VERSION="<%linktable%>.VERSION","Version","","1","2","0","0","0",""
ERP_PDM_NUMBER_LINKTABLE="<%linktable%>.ERP_PDM_NUMBER","ERP-Number","","0","2","0","0","0",""
ERP_PDM_NUMBER="<%erptable%>.ERP_PDM_NUMBER","ERP-Number","","1","2","0","0","1",""
MAT_NAME="<%erptable%>.MAT_NAME","Material","","1","2","1","0","0",""
ACTIVE_STATE="<%linktable%>.ACTIVE_STATE","Active State","I10","1","3","1","0","0",""
REQUESTED_STATE="<%linktable%>.REQUESTED_STATE","Requested State","I10","1","3","1","0","0",""
DESCRIPTION="<%erptable%>.DESCRIPTION","Description","","1","2","1","0","0",""
VARIANT="<%linktable%>.VARIANT","Variant","","1","1","0","0","0",""
Dies korrespondiert mit der Auflistung in der Benutzeroberfläche unter PARTlinkManager -> Extras Menü -> Konfigurieren [Configure] Dialogfenster -> PARTlinkManager Einstellungen [PARTlinkManager preferences] Registerseite -> Spaltenanzeige konfigurieren [Modify column display].
Spalten erstellen für PARTdataManager Tabelle
![[Hinweis]](images/note.png) | Hinweis |
|---|---|
Zufügen und Löschen von Zeilen (Spalten) an dieser Stelle betrifft die interne ENTERPRISE 3Dfindit-Konfiguration. Es findet dabei kein Datenbankzugriff statt. Es kann also passieren, dass Spalten zugefügt werden, die aber in der Datenbank selbst nicht existieren. In solchen Fällen erscheint beim Login eine Fehlermeldung. Probleme können einfach vermieden werden, wenn Sie den Dialog unter PARTlinkManager -> Datenbank [Database]-> Datenbankspalten ändern/erzeugen [Modify/create database columns] (mit gesetzter Option ERP Spalte anlegen [Create ERP column] [innerhalb ENTERPRISE 3Dfindit]) verwenden. Dann wird die neue Spalte sowohl in der Datenbank als auch in ENTERPRISE 3Dfindit angelegt. Für Details siehe Abschnitt 5.3, „Datenbankspalten hinzufügen / entfernen “.
Details zum Erstellen von Datenbanktabellen via Skripting finden Sie unter Abschnitt 5.2.4.1, „Installations Skripte “. | |
Spaltenposition in PARTlinkManager
Selektieren Sie die entsprechende Zeile und ziehen Sie diese mit gehaltener Maustaste an die gewünschte Position nach oben oder unten.
Feldname in der Datenbank. Wenn Sie beispielsweise eine SQL-Abfrage ausführen mit select * from ERPTABLE werden diese Spaltennamen angezeigt.
Der Name wird in 3Dfindit als dünn geschriebener Name der Spalte verwendet, in PARTdataManager als fett geschriebener.
Die 3Dfindit Module arbeiten intern mit diesem Namen.
"Tabelle" korrespondiert entweder mit LINKTABLE oder mit ERPTABLE. Neu zugefügte Spalten werden normalerweise in die ERPTABLE eingetragen.
Übersetzte Beschreibung [Translated description]:
Die übersetzte Beschreibung findet sich - sofern vorhanden - unter PARTlinkManager -> Extras Menü -> ERP-Umgebung konfigurieren [Configure ERP environment] -> Übersetzungen [Translations] Registerseite
Ist für die aktive Sprache unter PARTlinkManager -> Extras -> ERP-Umgebung konfigurieren [Configure ERP environment] -> Registerseite Übersetzungen [Translations] kein Eintrag vorhanden, wird der Text unter Beschreibung [Description] verwendet.
Vergleiche unter Übersetzte Beschreibung [Translated description].
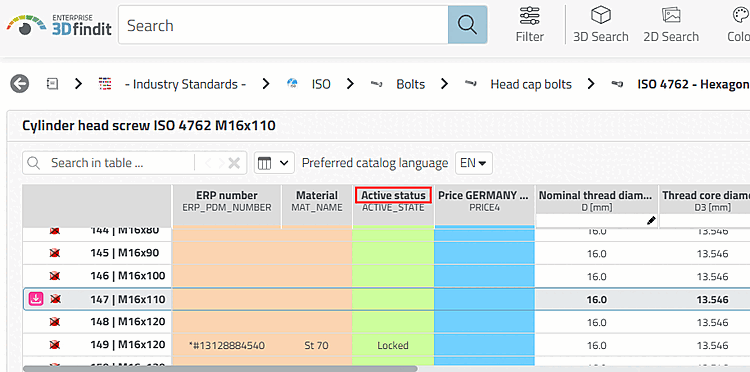
Sichtbar [Visible] korrespondiert mit der Spaltensichtbarkeit im Hauptfenster von PARTlinkManager. Diese kann auf Ja oder Nein gesetzt werden.
Die einzelnen Spalten in PARTlinkManager und PARTdataManager werden farbig markiert.
Der Gruppenname unter Spaltenanzeige konfigurieren [Modify column display] -> Spalte Gruppe [Group] korrespondiert mit den Gruppennamen unter Gruppendefinitionen [Group definitions].
(Verwechseln Sie nicht diese "Gruppe [Group]" mit der User-Gruppe (im Sinne von "Rolle"!)
Details finden Sie unter Abschnitt 5.10.7, „ Hintergrundfarben für ERP/PDM Spalten / plinkcommon.cfg -> Block [GROUP_COLORS] -> Schlüssel GROUP<Zahl> “.
Im PARTlinkManager Hauptfenster gibt es den Button . Mittels dieses Buttons erreichen Sie das Fenster Zeile editieren [Edit row], wo Sie die Datenbankfelder bearbeiten können. Wurde das Feld auf "Nein" gesetzt, besteht kein Zugriff.
Textausrichtung [Text justification]
Wertebereich Links | Rechts: Kann der Feldinhalt nicht vollständig angezeigt werden, wird das linke oder rechte Ende angezeigt (in PARTlinkManager, in der Spalte PSOL Projekt [PSOL Project] wird beispielsweise das Pfadende angezeigt).
Sie können im Spaltenkopf der Sachmerkmalstabelle in PARTdataManager/3Dfindit Icons verwenden. So können Sie Spalteninhalte als Fremdsystem-Information kennzeichnen (SAP zum Beispiel).
Mit
Klick auf den Durchsuchen Button wird ein
Explorer-Fenster geöffnet. Wählen Sie das gewünschte Icon.
Default-Speicherpfad ist $CADENAS_SETUP/bitmaps.
Einheit [Unit]: Wählen Sie optional die entsprechende Einheit (Länge, Gewicht, etc.).
Sprache [Language]: Geben Sie die LinkDB-Sprache an um sicherzustellen, dass die Volltextsuche optimal funktioniert.
Voraussetzung: Wenn TRANSLATIONTABLE für bestimmte ERP-Nummern, Variablen und Sprachen mit Werten befüllt ist und genau diese Variablen in dieser Option auf "Ja" gesetzt wurden, werden diese in 3Dfindit bzw. PARTdataManager angezeigt.
PARTlinkManager > "Extras" Menü> Datenbank [Database] > Zusätzliche Tabellen editieren [Edit additional tables]


![PARTlinkManager > "Extras" Menü> Datenbank [Database] > Zusätzliche Tabellen editieren [Edit additional tables]](resources/img/img_d6f2e8e67c1743dfb8b701ba2a11d648.png)

